Install Tongue & Groove Porch Decking
Install hardwood tongue-and-groove porch flooring with the right starting-board fastening, adhesive, blind-fastening technique and spacing. Use the field tips to manage alignment and butt joints.
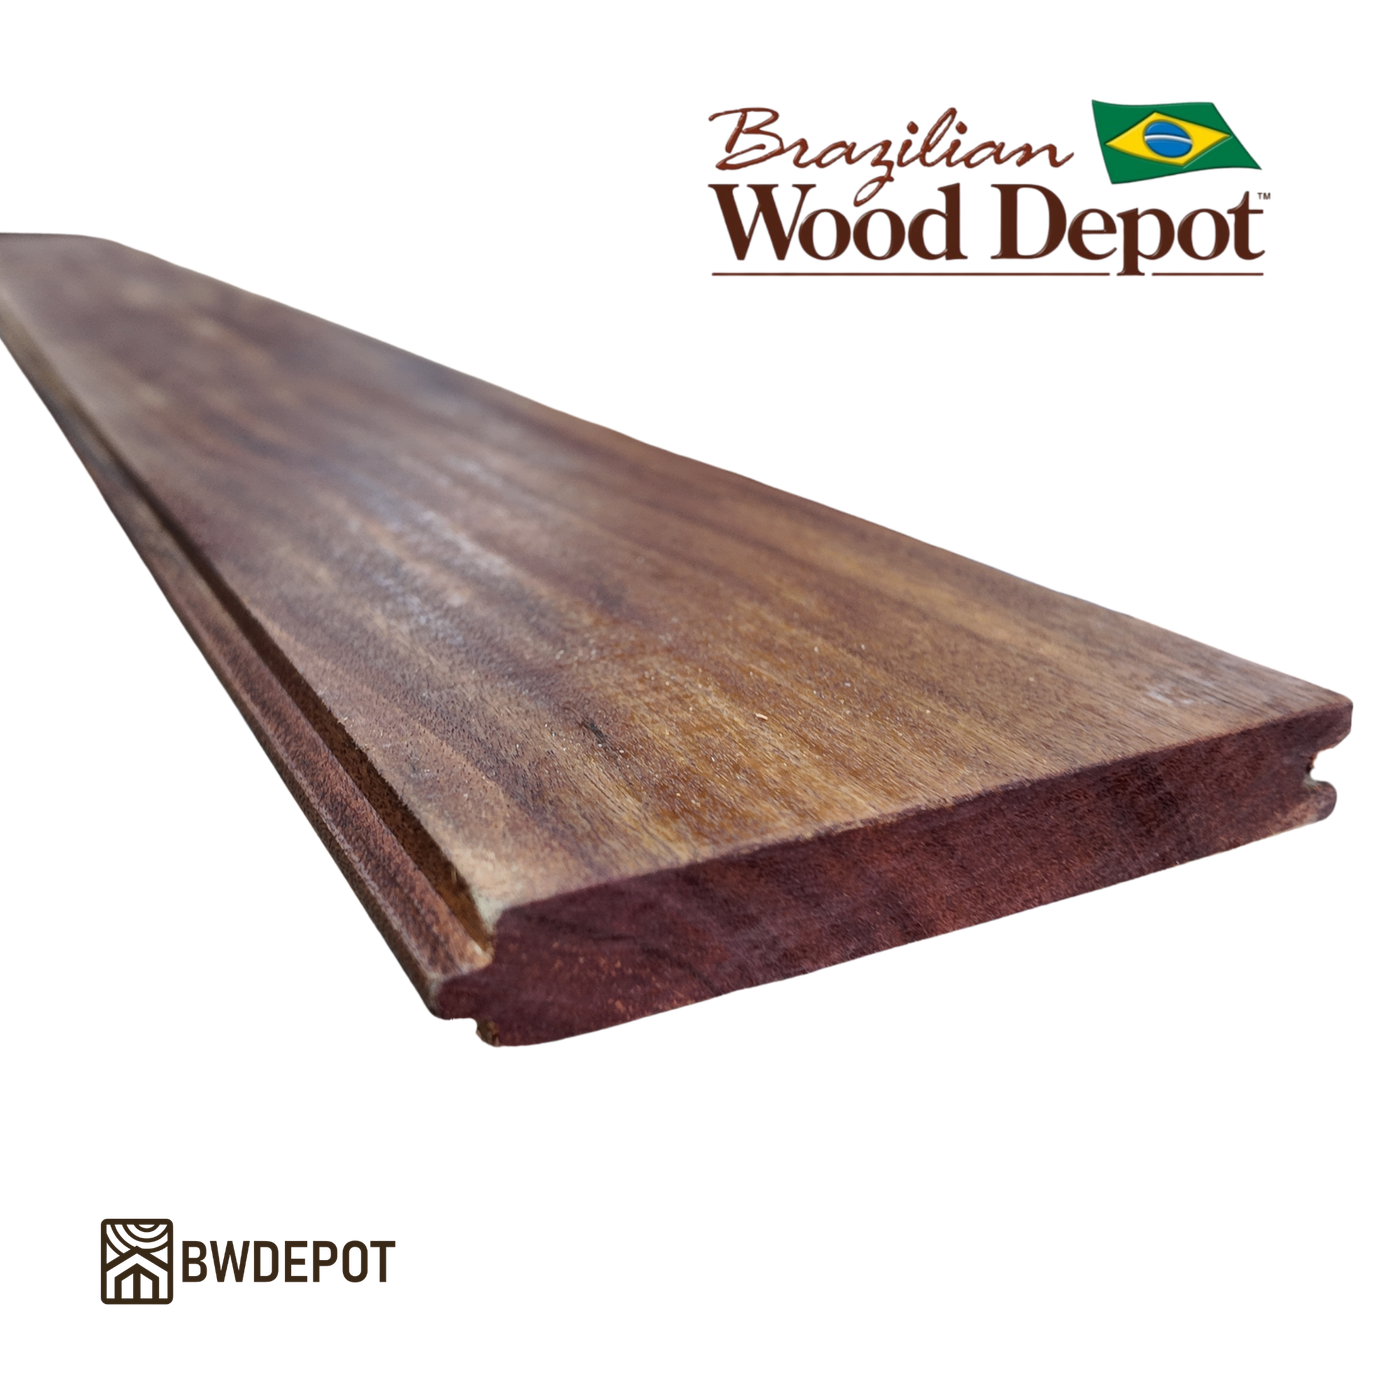
Preparation, Tools & Materials
Tongue-and-groove (T&G) hardwood porch flooring is blind-fastened through each board's tongue, with the first and final boards secured by face fastening. Prepare the framing and establish your installation direction before starting.
Tools
- Drill/driver, compatible trim-head driver bit and 1/8-inch pilot drill bit
- Measuring tape, straightedge or chalk line, and framing square
- Proper cutting tools and a board-straightening tool if needed
- 1/16-inch or 3/32-inch spacing aids as appropriate to board width
Materials
- Hardwood T&G porch boards and suitable joist/framing assembly
- Compatible exterior-rated trim-head screws for angled tongue fastening
- All-weather subfloor/construction adhesive compatible with this assembly
- End-grain sealer for freshly cut board ends
- Starting and finishing board fasteners from Chapter 03
Before You Begin
Use compatible all-weather subfloor adhesive along the joist tops where the boards are installed to help limit shifting and creaking during seasonal wood movement. Follow the adhesive manufacturer's guidance for exterior exposure and surface preparation.
Step-by-Step T&G Installation
Face-fasten the first and final boards; blind-fasten intermediate boards through the tongue. Maintain a deliberate expansion gap and check alignment as each row progresses.
Secure your starting board
Begin against the house or at the opposite perimeter, whichever best suits the layout. Install the first board using your preferred face-fastening approach from Chapter 03 — Trim & Perimeter Fastening. Position it carefully: it establishes the direction of every following board.
Apply all-weather subfloor adhesive
Run a bead of compatible adhesive along the tops of the joists supporting the next run of boards. Apply as you progress, following the product instructions.
Pre-drill and blind-fasten through the tongue
Using a 1/8-inch drill bit, without a countersink, pre-drill at roughly a 45° angle through the upper portion of the tongue toward the joist. Drive a compatible trim-head screw deeply enough to leave a clear path for the next board's groove, without damaging the tongue.
Preserve the expansion gap
Maintain approximately 1/16 inch between 3.5-inch boards. For 5-inch boards, consider a slightly larger gap of approximately 3/32 inch. Use a suitable spacer, or carefully adjust screw tension if using that method. Do not tightly force boards together.
Continue across the porch and check square
Repeat the adhesive, tongue pre-drilling and blind-fastening process. Frequently check alignment against the framing or wall you are working toward, making very small, gradual gap corrections when needed. See Chapter 04 — Field Tips.
Finish with a face-fastened board
Fit the final board, preserve appropriate perimeter clearance, and secure it using one of the three trim/perimeter face-fastening methods. Check that fastener heads are properly seated and fresh cuts are end-sealed.
Trim & Perimeter Fastening
The first and last T&G boards must be face-fastened, because their outer edges cannot be secured by the tongue-fastening technique used across the middle of the porch. Choose one of these three established methods.
Choose Your Perimeter Fastening Method
01Stainless-Steel Trim-Head ScrewsSmall recessed screw heads without plugs
- Use a 1/8-inch drill bit to predrill through the decking and into the framing at each fastening location.
- Drive a stainless-steel trim-head screw through each pilot hole.
- Set the screw head slightly below the board surface. Surrounding wood fibers can compress around the small head, helping conceal it.
- Confirm each screw is secure and no raised or sharp screw heads remain.
02Brown-Head Stainless-Steel Screws + SMART-BITColor-matched screw heads with a controlled countersink
- Use the appropriate SMART-BIT to predrill the decking and countersink the hole for the screw head.
- Drive the compatible brown-head stainless-steel screw into the prepared hole and framing.
- Seat the screw head neatly within the countersink without overdriving it.
- Inspect the finished fasteners for consistent depth and secure attachment.
03Pro Plug SystemConcealed fastening with matching hardwood plugs
- Use the Pro Plug installation tool to predrill the pilot hole and bore the recess for the hardwood plug. Move the tool in and out a couple of times to clear the hole and ensure the full recess diameter is formed.
- Drive the supplied stainless-steel screw into the prepared hole.
- Insert a matching hardwood plug. For more secure retention, apply compatible wood glue to the inside walls of the recess first. Omitting glue may make future plug removal easier, but reduces retention security; follow the manufacturer's instructions for the intended installation.
- Tap the plug flush using a scrap block and mallet or hammer. Sand lightly if needed.

T&G-Specific Details & Field Tips
Two practical advantages of the T&G profile are its ability to accommodate small alignment corrections and its interlocking support at ordinary board-to-board butt joints.
01Keep Square with the Framing You Are Working Toward
As each row goes down, regularly check square and parallel alignment against the framing or terminating wall you are working toward—not only against the row you just installed.
Natural hardwood boards may vary slightly in width, even along a single board. Framing and walls may also be a little out of square. Minor differences can accumulate across many rows.
Check alignment at both ends of the board run. Make small, gradual adjustments to board spacing to compensate while you still have room. This lets you subtly “cheat” the gaps so the final rows finish cleanly and parallel. Spread corrections across multiple rows rather than making a conspicuous adjustment at the end. Continue to respect the required movement gaps.
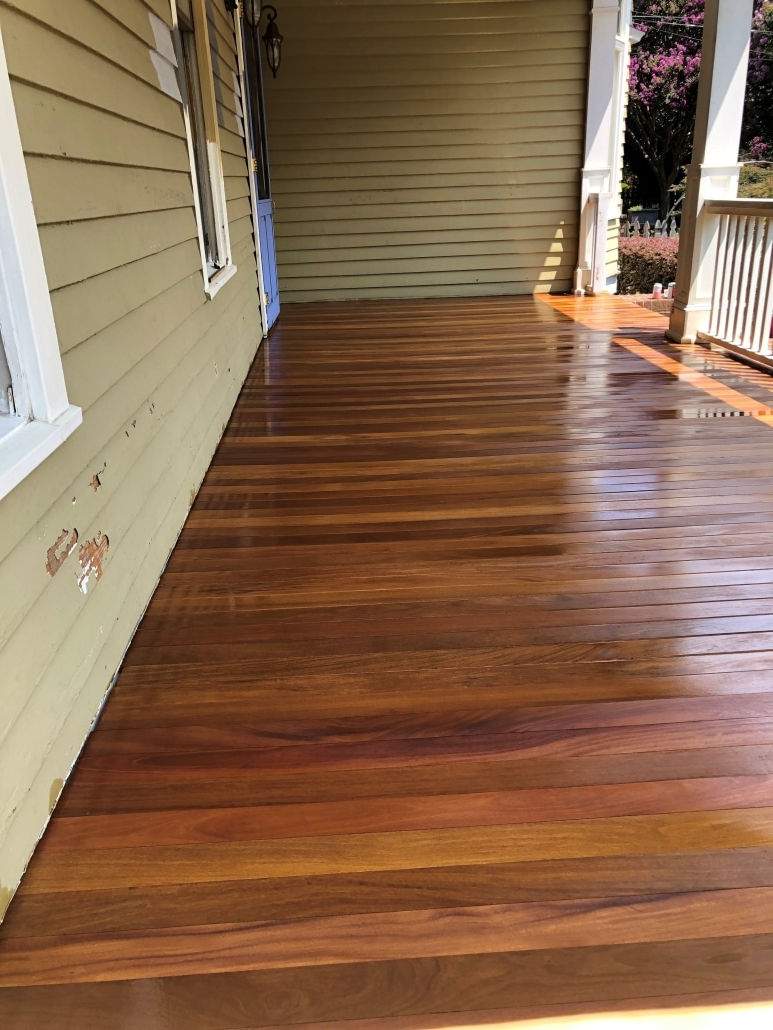
02Butt Joints Usually Do Not Need to Fall on a Joist
Unlike ordinary deck boards, T&G porch flooring is continuously interlocked along the long edges. The board ends are generally not T&G-milled, but their interlocking neighboring boards help support an ordinary butt joint between joists.
For the intended T&G porch system, do not routinely cut boards back to the nearest joist just to land a butt joint on framing. That can waste otherwise useful board length. Make sure adjoining boards are properly engaged and fastened, and follow any project-specific structural or product requirements.
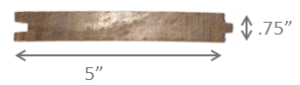
03Spacing for 3.5-Inch vs. 5-Inch Profiles
The installation guidance uses approximately 1/16 inch of separation for 3.5-inch T&G; when working with the wider 5-inch profile, consider increasing to approximately 3/32 inch. Gap selection should also account for actual board moisture and installation conditions. Never install the joints tightly closed.
04Fasteners, Adhesive & Nail-Gun Considerations
We recommend trim-head screws for tongue fastening. The concealed location makes careful pre-drilling and proper screw seating especially important: a protruding head can obstruct the next groove.
Some installers have used nail guns to accelerate installation. If considering that approach, suitable subfloor adhesive becomes even more important to help limit shifting and squeaking. Verify nail compatibility, holding strength and the requirements of the actual porch assembly rather than assuming nails are equivalent to screws.
Installation Photos & Printable Instructions
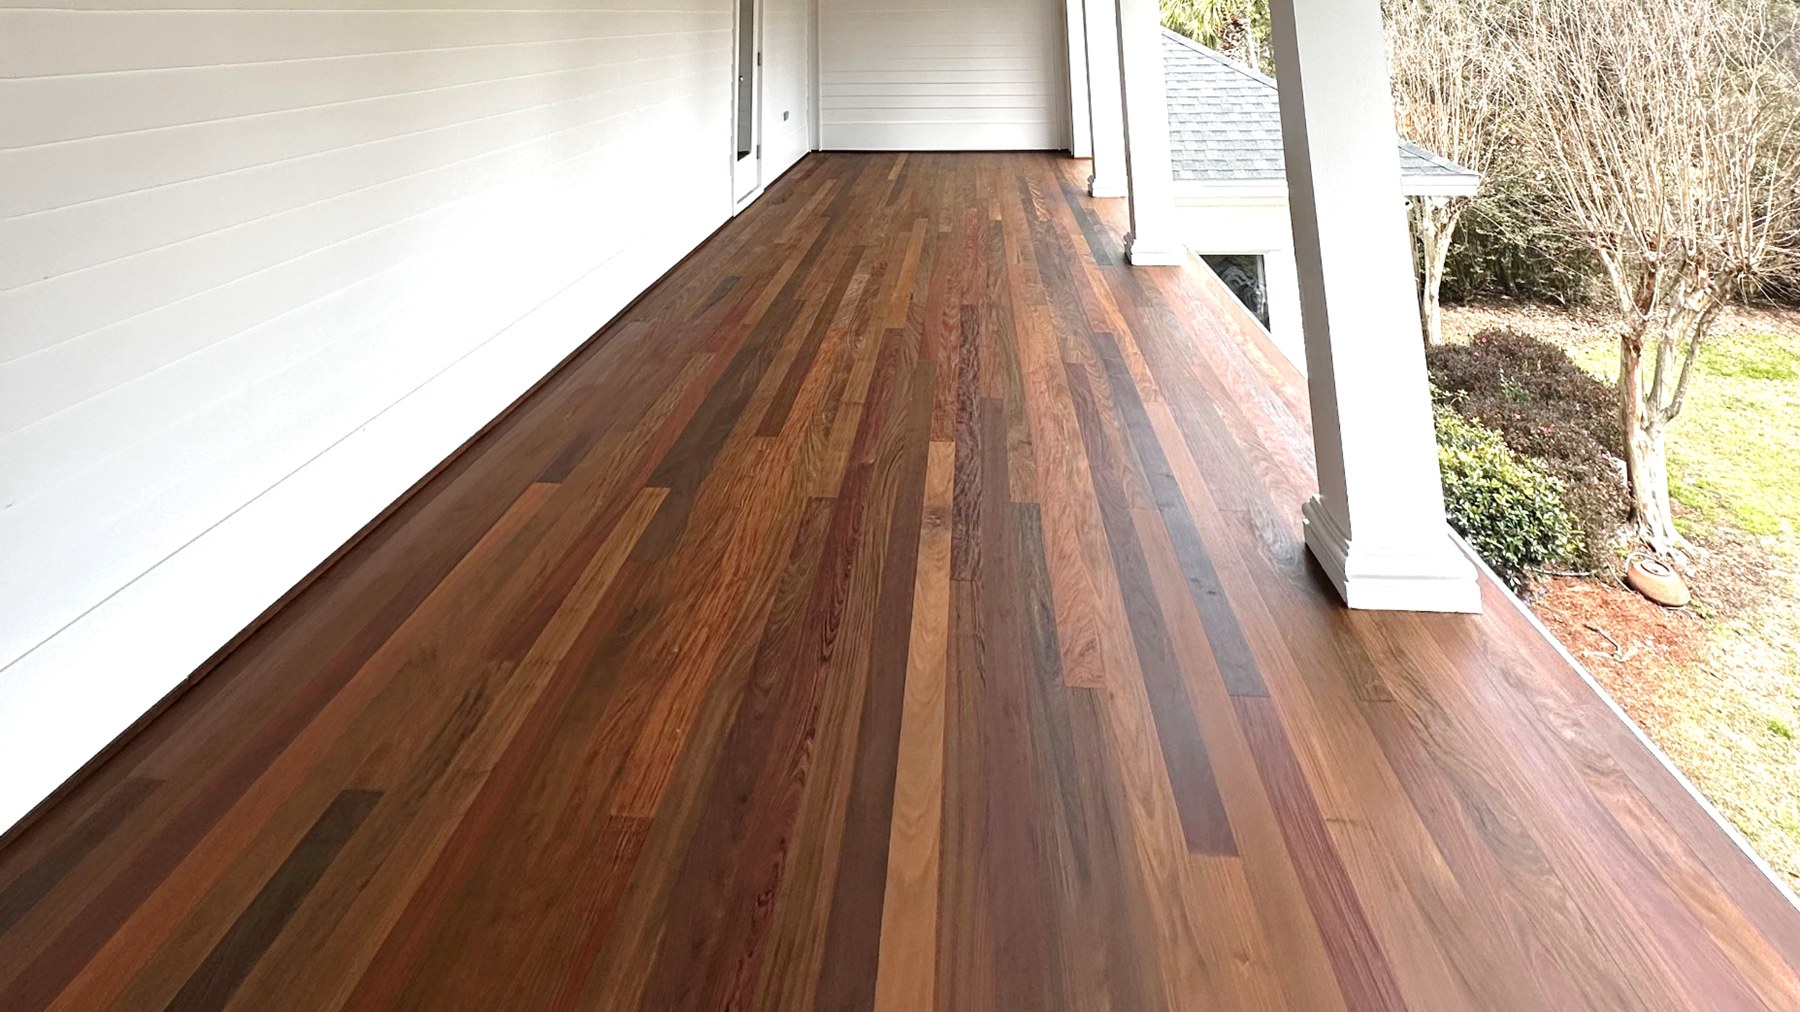
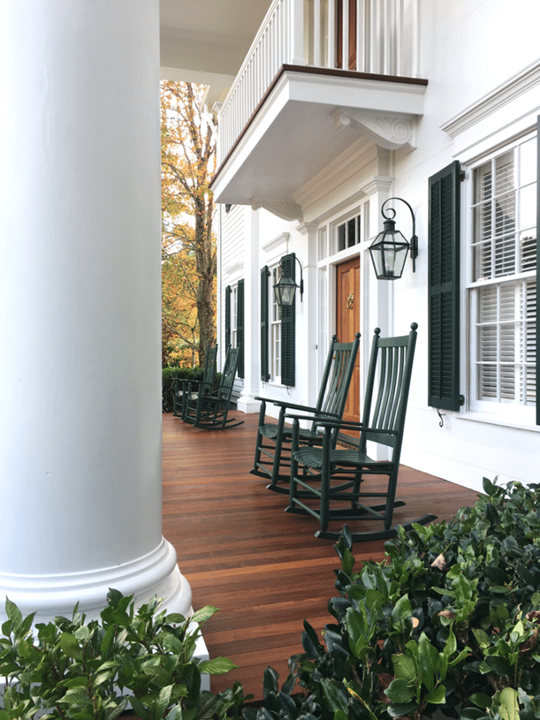
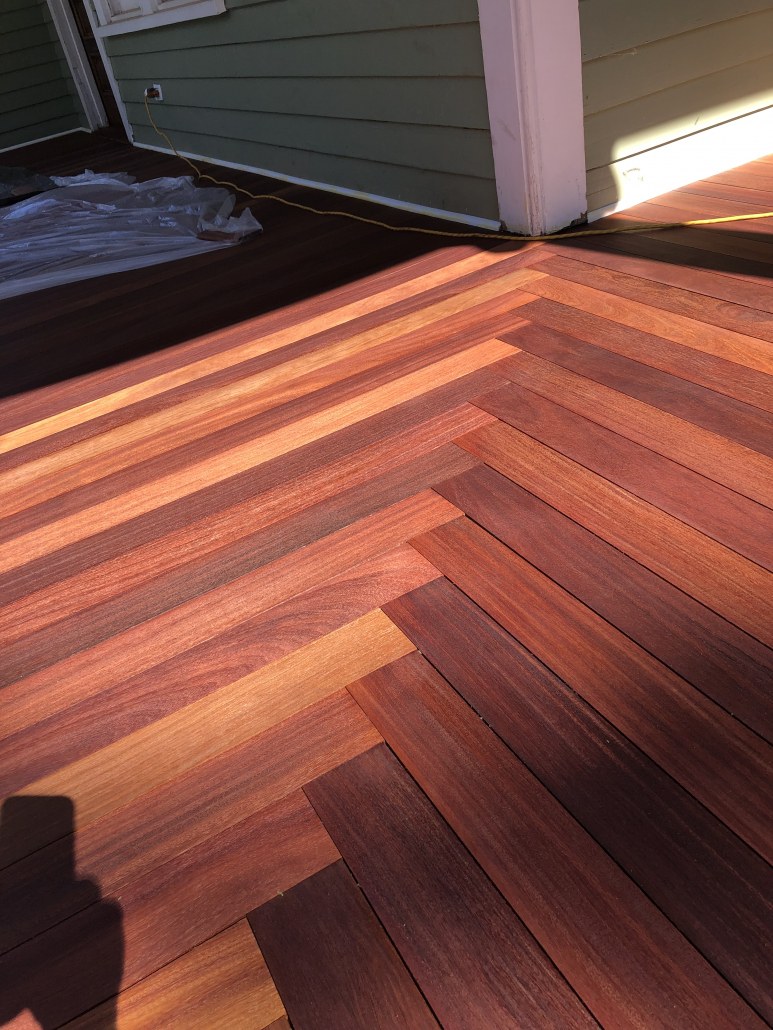
Explore finished T&G porch applications and keep a concise printable copy of the installation steps available on the jobsite.
Tongue & Groove Porch Examples
Printable Installation Instructions
Step-by-Step T&G Porch Installation (PDF)
Download or print a compact reference covering preparation, face-fastened starting and ending boards, tongue fastening, board gaps, and field tips.
Universal Hardwood Installation Tips
Expand any topic for practical hardwood installation guidance and supporting illustrations.
01End Sealing & Decking Oil
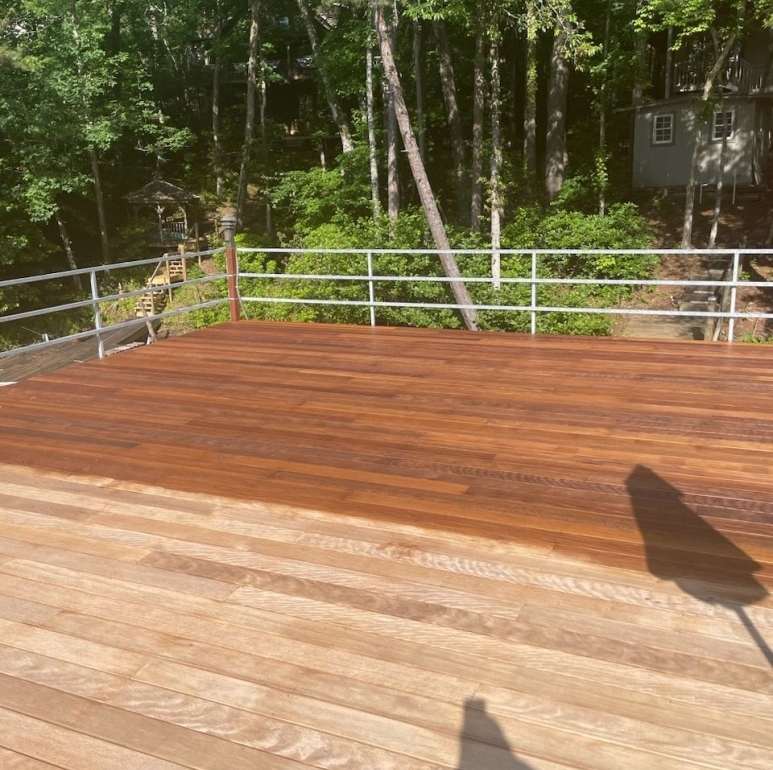
Seal every freshly cut board end with an appropriate end-grain sealer to help prevent end checking (small cracks at board ends).
Apply decking oil after installation, not before, to avoid disturbing the finish during construction.
Oiling is optional. Without it, hardwood naturally weathers to a silver-gray patina. This color change does not reduce structural performance or longevity. Oiling the underside of the boards is unnecessary.
02Storage & Climatization
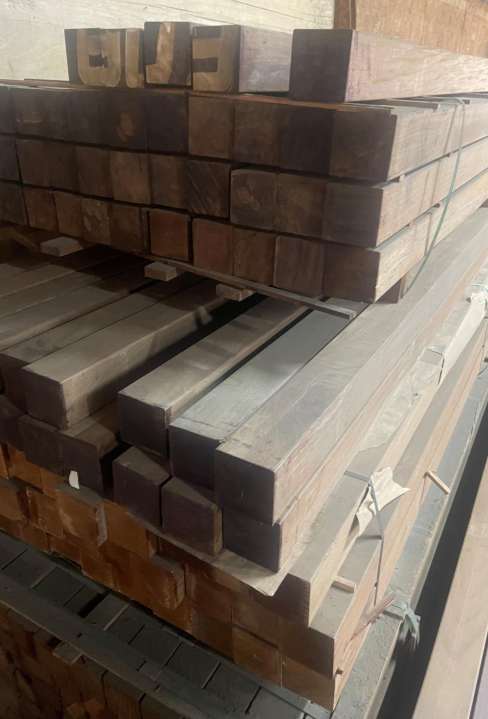
Store hardwood off the ground, out of direct sunlight, and protected from rain until installation.
If covering the lumber, use a clean, undamaged tarp and leave the sides open for airflow. Avoid wrapping or sealing the bundle tightly.
Where appropriate, place clean, non-staining spacers between board layers to improve ventilation and help the wood adjust to local conditions.
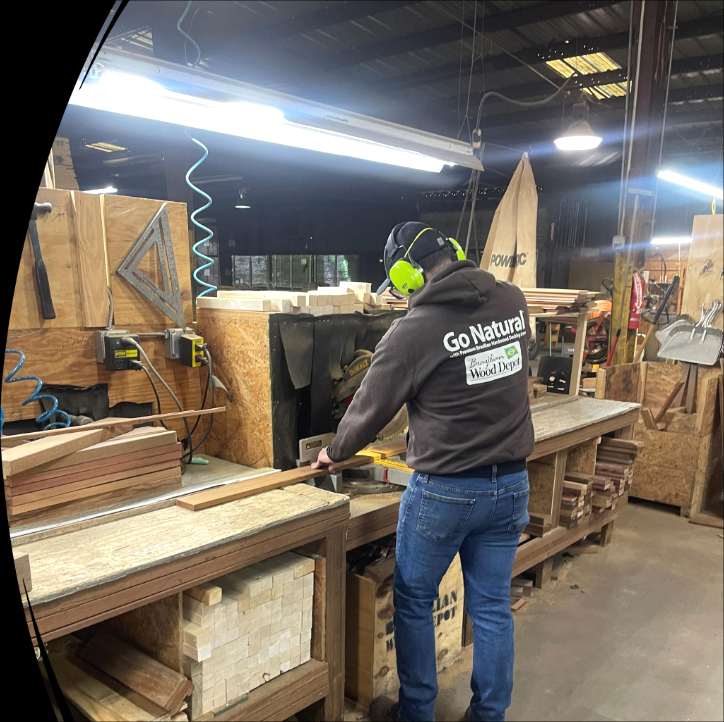
03Cutting, Drilling & Tooling
Hardwoods such as Ipe are exceptionally dense, but can be cut and drilled with conventional woodworking equipment using quality carbide-tipped blades and bits.
Fine-tooth saw blades can help produce cleaner cuts with less chipping. Expect more wear on cutting tools than with softwoods.
Manage sawdust carefully. Use appropriate dust collection and respiratory protection, position cutting operations away from occupied areas, and wash exposed skin if irritation occurs.
04Stainless-Steel Fasteners & Staining Prevention
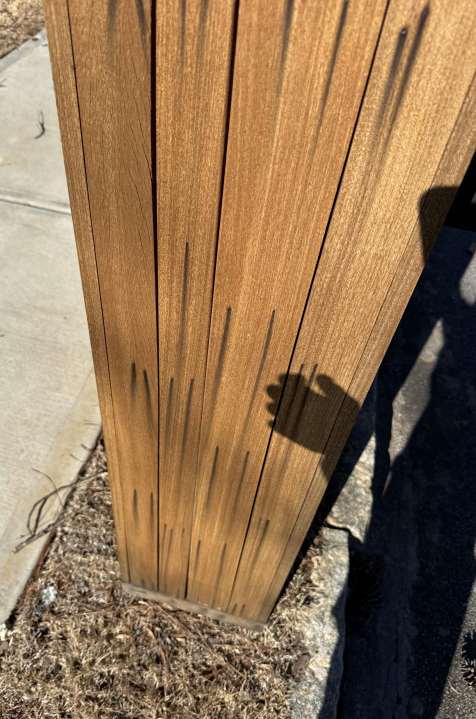
Use stainless-steel hardware for exposed decking fasteners. Ordinary steel can corrode when exposed to moisture, leaving dark stains around fasteners.
Similar staining can result from stray steel shavings, unprotected metal furniture, or other iron-containing debris contacting wet hardwood.
Surface stains may be removable with an appropriate wood-cleaning product, but staining can return unless the source of iron contamination is corrected.
05Easing the Ends of Deck Boards
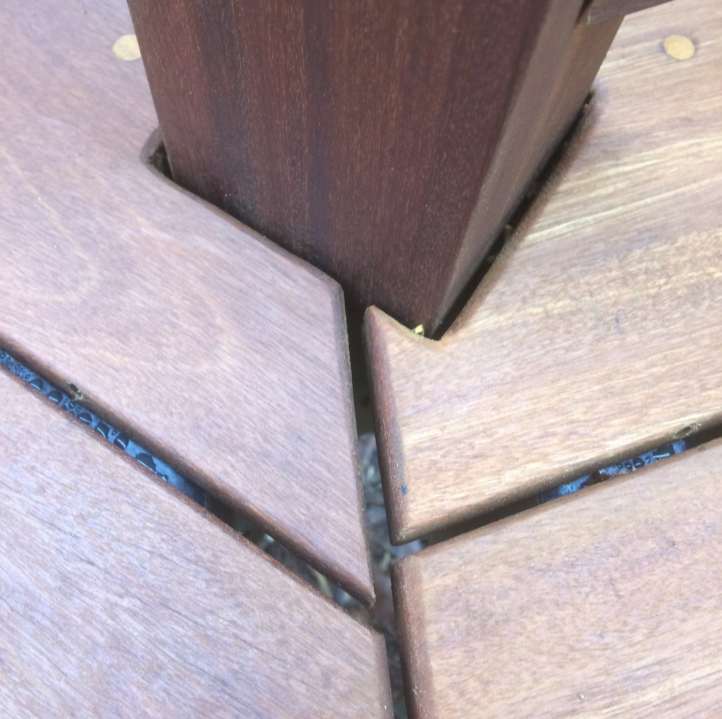
Hardwood decking typically arrives with eased (rounded) long edges, while factory-cut ends and newly cut edges remain square.
For a more finished appearance, soften exposed square edges using an orbital sander with approximately 60-grit abrasive, or a router fitted with a 1/8-inch round-over bit.
This detail helps board ends, butt joints, and cuts around posts look consistent with the factory-finished edges.
06Proper Board Spacing
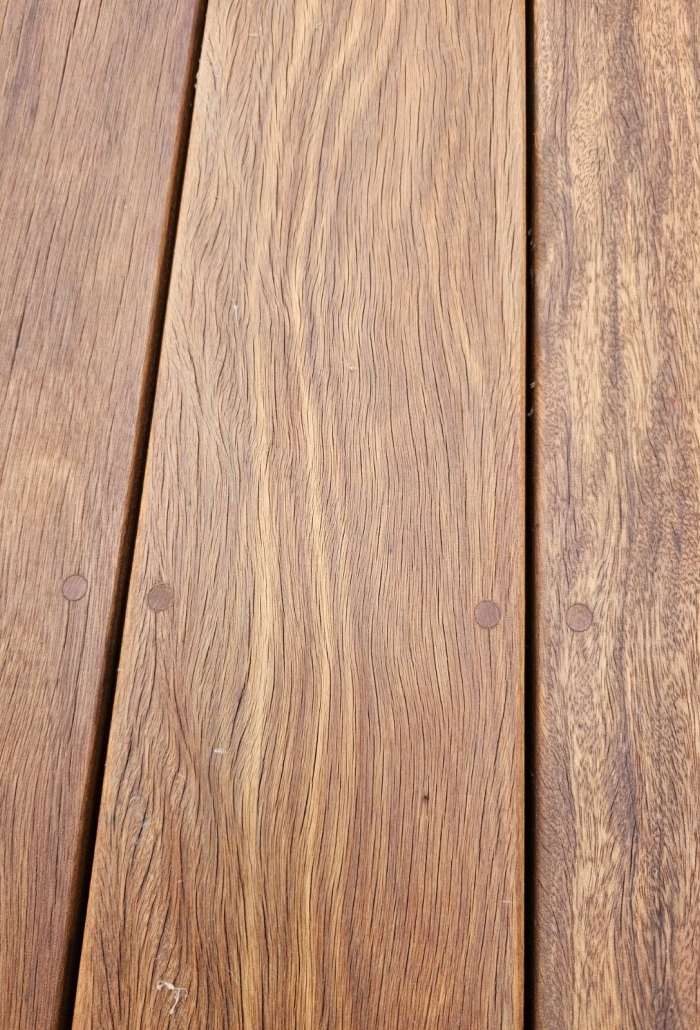
For typical hardwood decking, 1/8-inch spacing between adjacent boards is our general recommendation, with an acceptable range of approximately 3/32 to 3/16 inch, depending on fastening system and installation conditions.
For T&G porch flooring, use the profile-specific gap guidance in Chapter 02 and Chapter 04 instead of spacing rules intended for other fastening systems.
For end-to-end butt joints, an optional 1/16-inch gap can improve appearance by making the joint look deliberate. This is primarily an aesthetic recommendation.
07Avoiding Mitered Joints
Where possible, avoid 45-degree mitered joints at picture-frame corners, stair treads, and other exposed deck transitions.
Seasonal wood movement can cause mitered corners to open or become visibly misaligned over time.
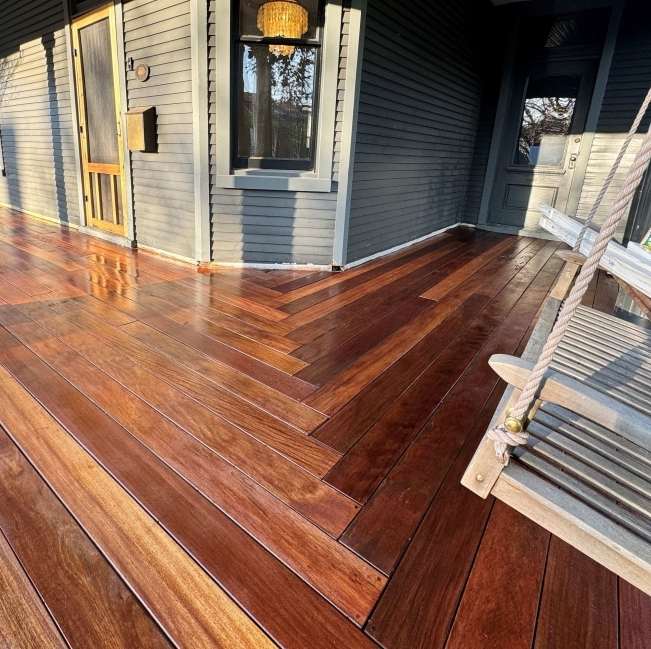
Consider an alternative such as the lap-style corner joint shown in the accompanying photograph. Plan exposed joints with natural hardwood movement in mind.
08Installing Wide Fascia Boards
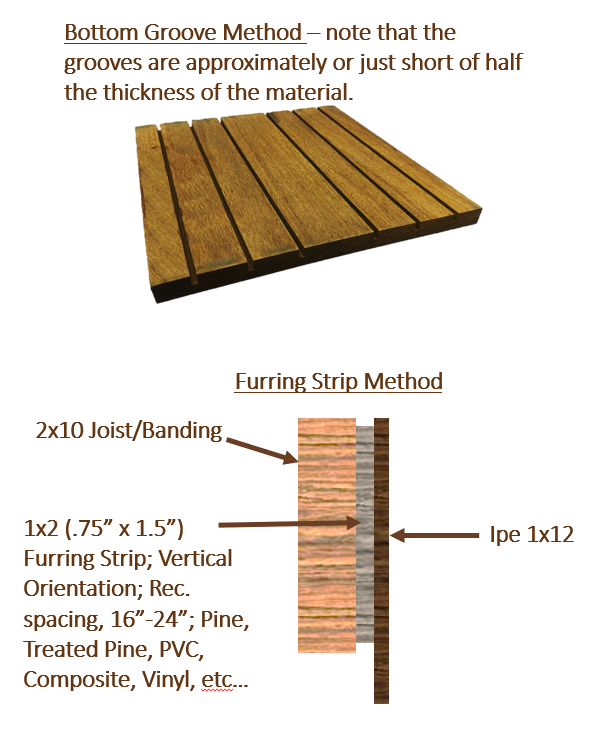
Wide hardwood fascia, particularly 1×12 boards, can be susceptible to cupping when fastened directly against solid framing without adequate ventilation.
The illustration shows two approaches: bottom grooving the fascia to help relieve cupping tendencies, or installing it over vertical furring strips to create an air gap.
For the furring-strip method, the original recommendation is a 1/2- to 3/4-inch air gap, with vertical strips spaced approximately 16–24 inches apart.
Airflow, Ventilation & Moisture Management
Understand how moisture imbalances cause cupping, how framing affects airflow, and how drainage systems can be designed to protect hardwood decking.
For closely fitted T&G porch flooring, prioritize a dry, well-drained substrate and appropriate ventilation beneath the flooring. Some examples below illustrate conventional open-gap decks; apply the moisture-management principles to the conditions of your covered porch.
01Ventilation, Airflow & Cupping Prevention
Why Does Airflow Matter?
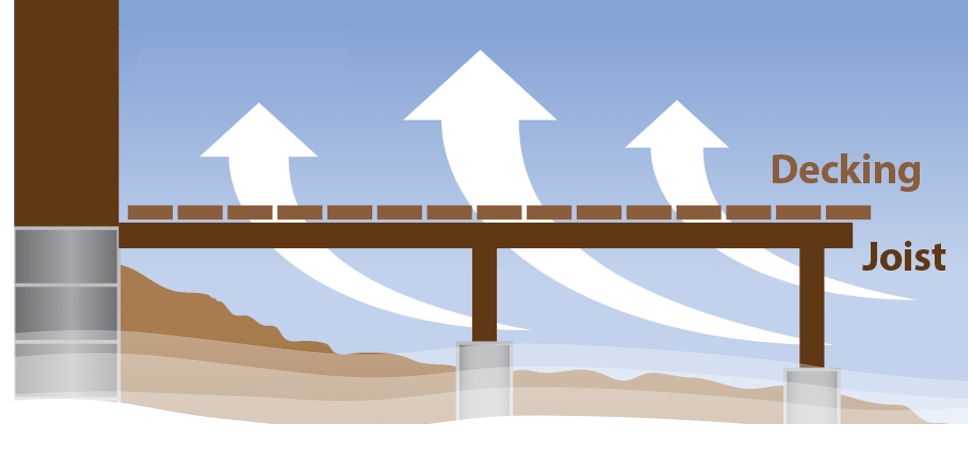
Hardwood decking naturally expands and contracts in response to moisture. When conditions above and below a board differ significantly, the wood can move unevenly, potentially causing cupping—a curve across the width of the board.
This is especially common when:
- The underside remains exposed to elevated humidity.
- The upper surface dries more quickly from sunlight and air exposure.
- Restricted airflow prevents moisture beneath the deck from dissipating.
What Happens When Airflow Is Restricted?

The first animation illustrates a deck surrounded by barriers that restrict ventilation beneath the boards.
- Moisture accumulates beneath the decking, keeping the underside relatively humid.
- Sunlight dries the upper surface, causing it to contract.
- The underside retains more moisture, creating uneven movement that can cause cupping.
How Does Improved Ventilation Help?

The second animation demonstrates how opening the sides of a deck and promoting airflow can improve moisture conditions.
- Reduce trapped humidity beneath decking.
- Minimize moisture differences between upper and lower board surfaces.
- Promote more uniform movement as conditions change.
- Reduce cupping risk and, in some cases, help affected boards recover toward a flatter shape.
Best Practices
Design hardwood decks with adequate ventilation beneath the boards whenever possible. Avoid enclosing the deck perimeter unnecessarily or creating conditions that trap moisture.
Remember: Proper airflow is not simply about drying the wood; it is about minimizing the moisture imbalance between the top and bottom of each board.
For the deeper explanation and real-world examples, read Ipe Decking Cupping: Causes, Prevention & Solutions.
02Blocking & Framing Best Practices
Why Does Blocking Matter?
Blocking provides structural support, but excessive blocking and continuous framing surfaces can increase the risk of cupping. Large areas of direct contact can restrict drying beneath the boards.
What Does Problematic Blocking Look Like?
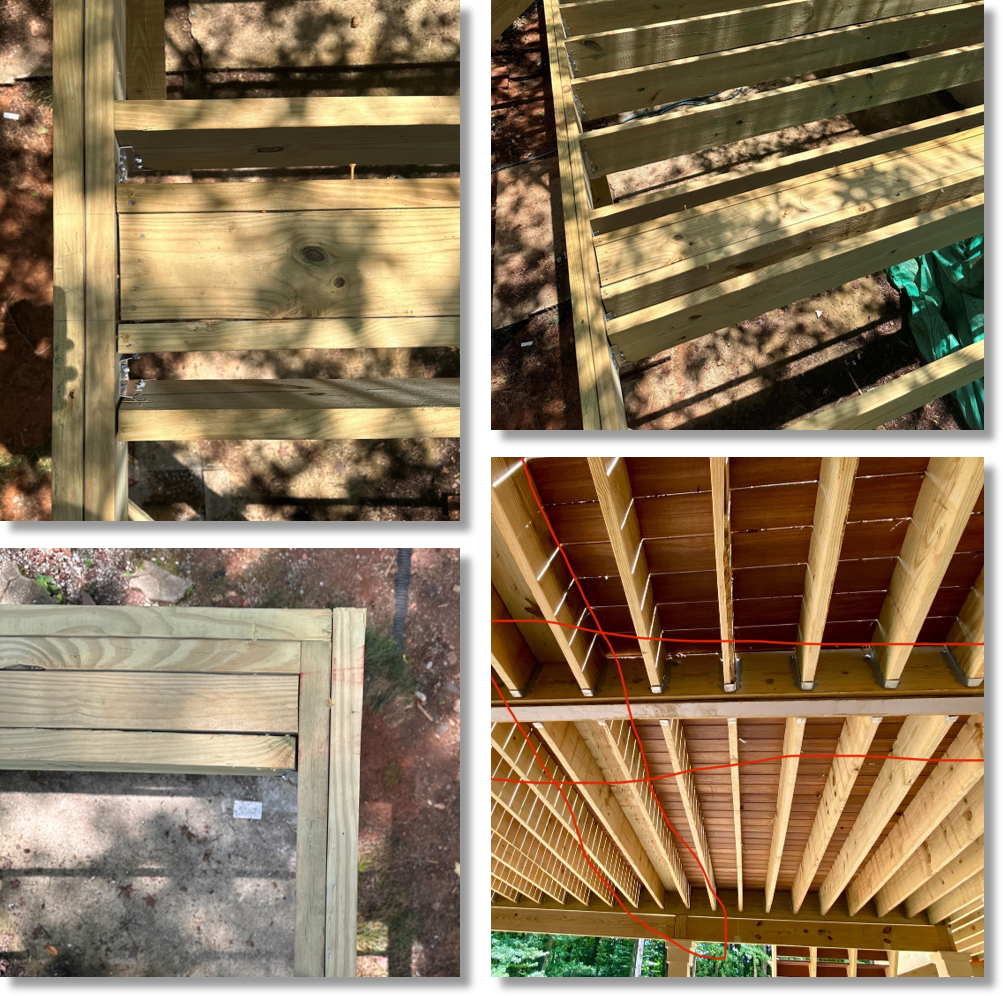
- Blocking perpendicular to deck boards: Localized cupping may occur where boards cross excessive framing, sometimes affecting approximately 6–8 inches of their length.
- Blocking parallel to deck boards: Continuous contact can affect a much greater portion of a board, potentially contributing to cupping along its length.
Key principle: Minimize unnecessary contact between the decking and framing.
What Are Better Framing Alternatives?
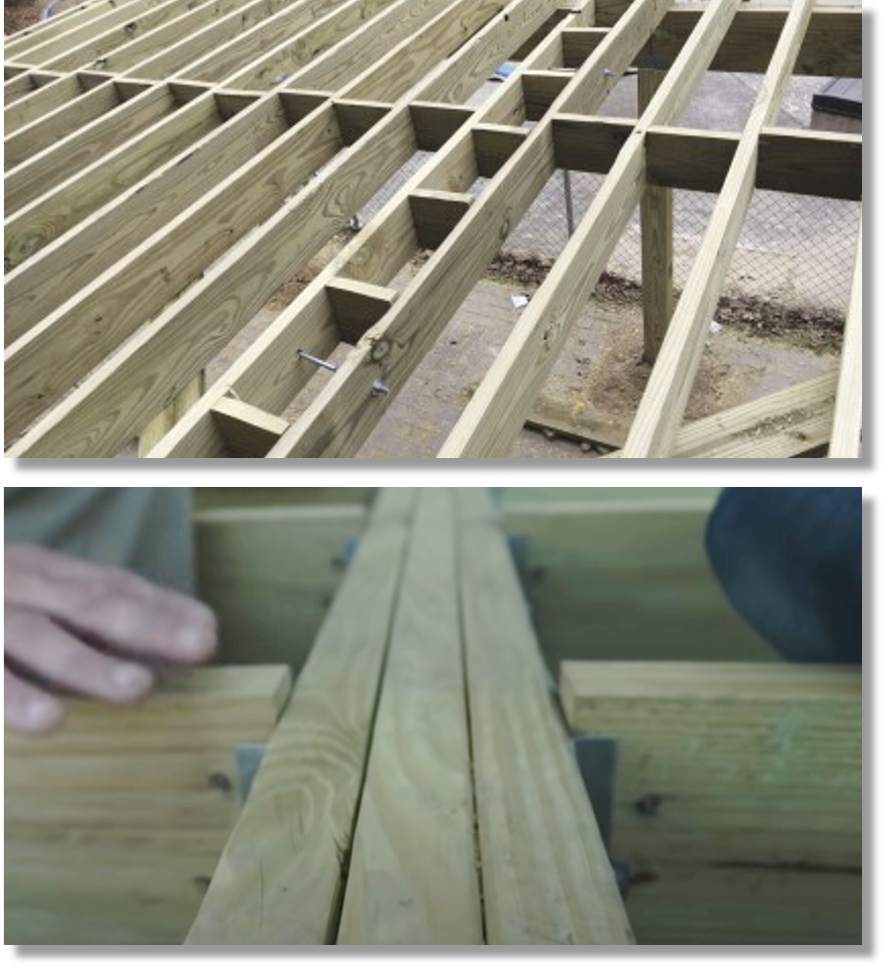
Ladder-style blocking reduces unnecessary continuous surface contact beneath the decking.
Recessed beam with furring strips: In the original example, a triple beam is set approximately 1/2 inch below adjoining joists. Narrow 1/2-inch marine-grade plywood strips, approximately 1.5–2 inches wide, restore the decking elevation while reducing continuous contact.
Best Practices
- Avoid excessive blocking beneath hardwood decking.
- Reduce unnecessary continuous contact with framing.
- Plan framing details before installation, particularly around beams.
- Maintain structural integrity. Any framing modifications must meet applicable structural requirements.
Remember: The goal is not to eliminate necessary blocking; it is to provide structural support without creating avoidable moisture traps.
See additional framing examples and retrofit strategies in our Hardwood Deck Cupping Guide.
03Under-Deck Drainage Systems
Why Drainage Systems Affect Hardwood Decking
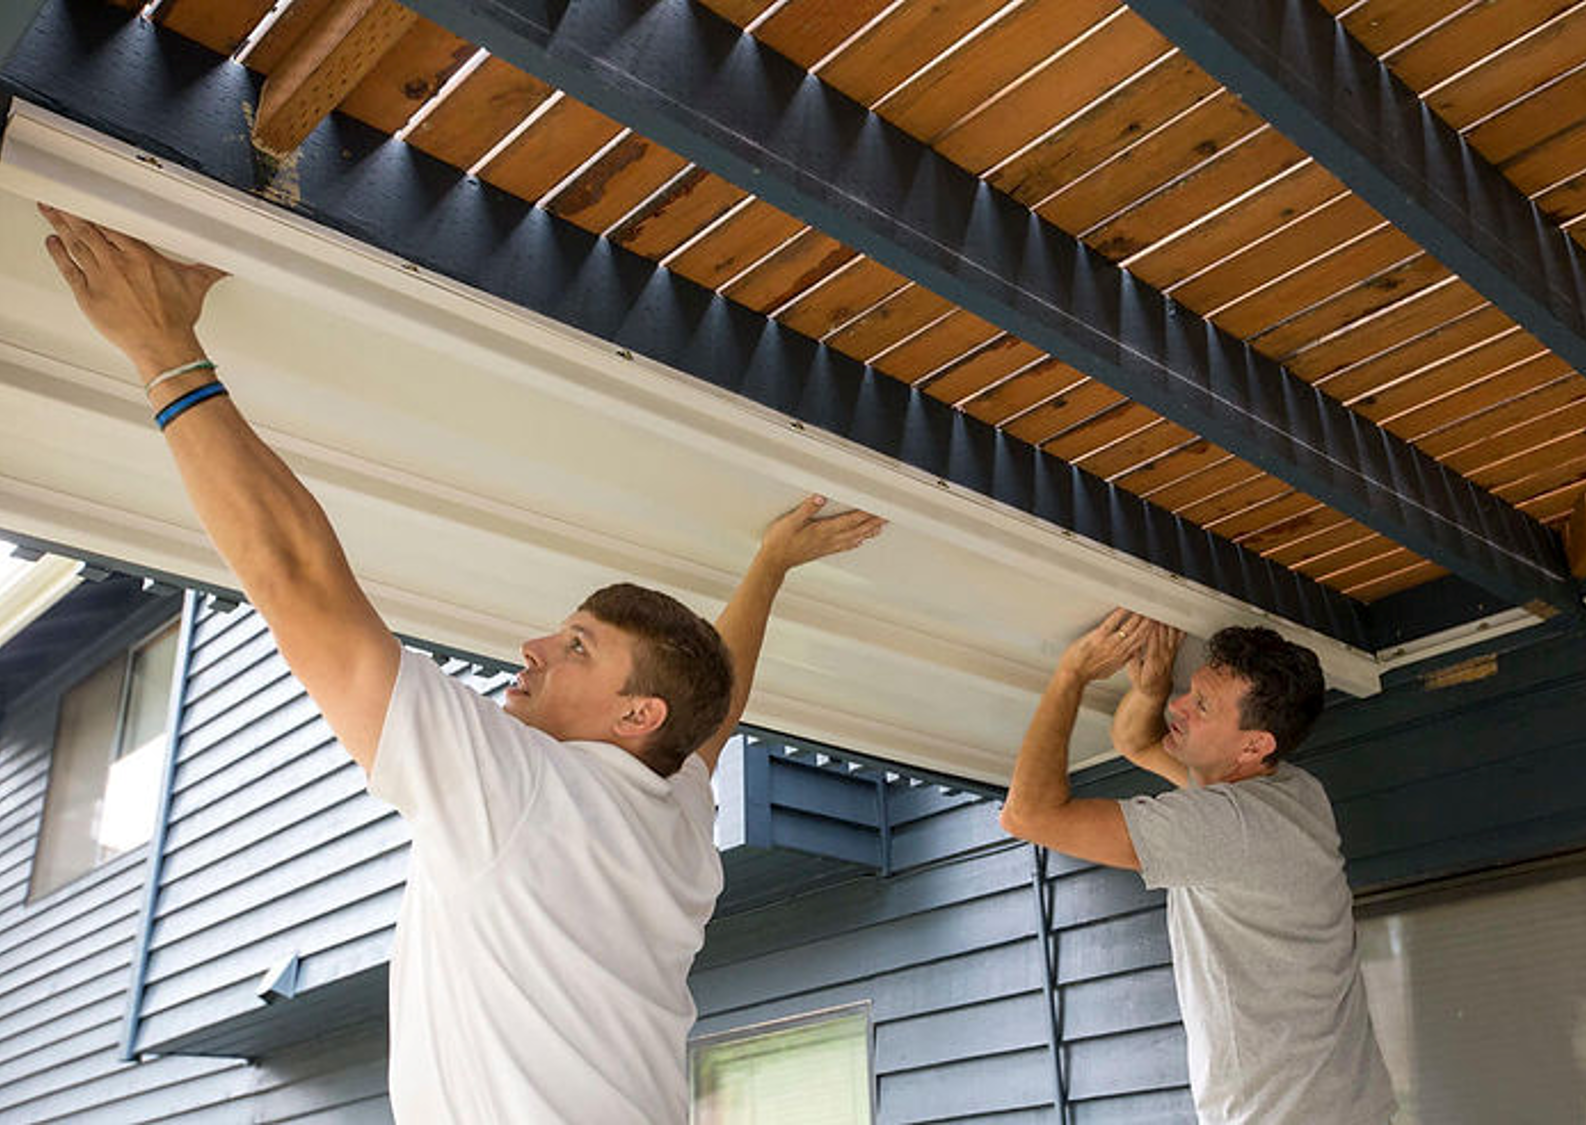
Under-deck drainage systems can create useful dry space beneath an elevated deck. However, some designs restrict airflow and trap humidity beneath hardwood boards, increasing cupping risk.
The critical consideration is how much ventilation remains between the decking and drainage barrier.
Comparing Drainage System Types
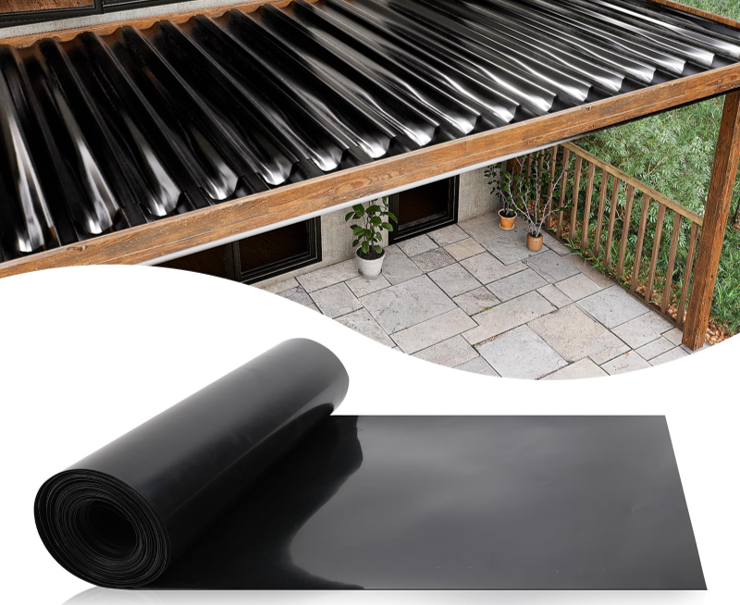
Membrane Systems (Rubber or Vinyl)
- Generally economical and straightforward to install.
- Can restrict airflow directly beneath the decking, particularly when installed between joists.
- May leave joists well ventilated while allowing humidity to remain trapped near the boards.
Rigid or Pan-Style Systems
- Typically installed beneath the joists.
- Can provide better airflow around decking and framing when adequate separation is maintained.
- May incorporate spacers, ventilation openings, or mechanical airflow.
Neither system automatically eliminates cupping risk. Drainage and ventilation must work together.
Maintaining Separation & Ventilation
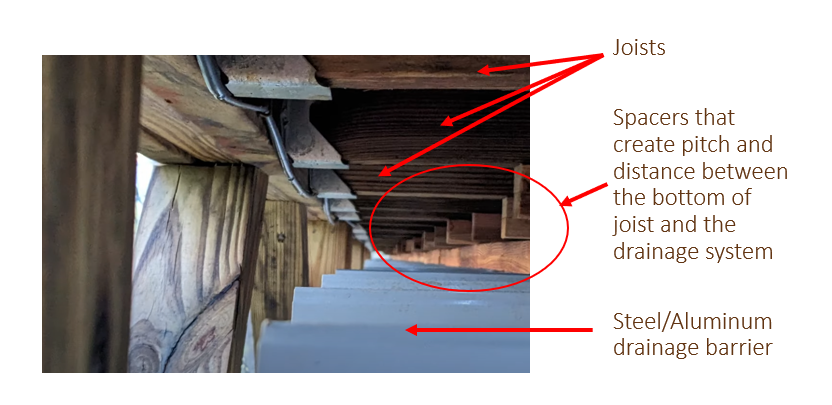
The annotated example shows how spacers beneath the joists can create both drainage pitch and separation between the framing and rigid drainage barrier, helping preserve room for air movement.
Before selecting a drainage system, review our complete guide to hardwood deck drainage and cupping prevention.
Bottom-Grooved Hardwood Decking
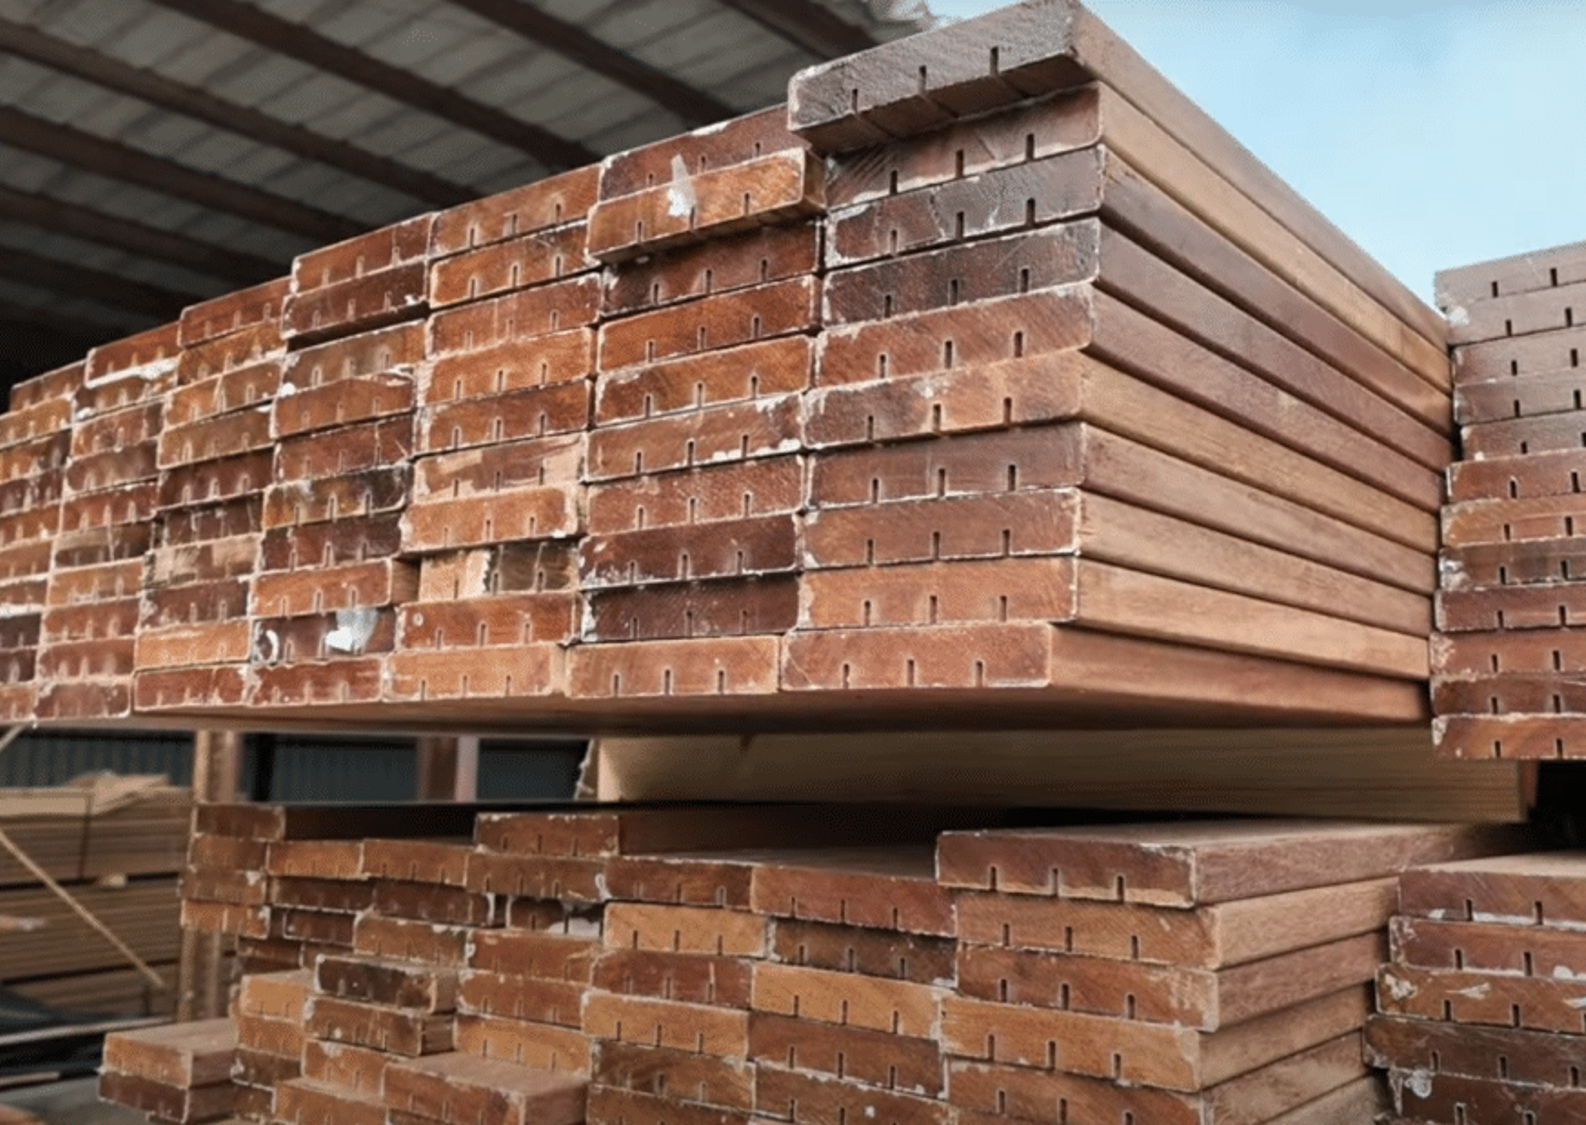
Where under-deck ventilation is difficult to improve, bottom-grooved hardwood boards can help reduce the likelihood and severity of cupping by relieving some stresses associated with uneven moisture exposure.
Bottom grooving is particularly worth considering for:
- Decks above drainage systems.
- Low-clearance or enclosed decks.
- Installations with extensive framing contact.
Bottom grooving is a preventative measure, not a substitute for proper drainage and airflow.
Other Solutions for Challenging Installations
For decks with severely restricted ventilation, alternatives may include hardwood deck tiles, integrated vents, or humidity-controlled ventilation fans. Evaluate the specific deck design, drainage access, and maintenance requirements before choosing a solution.
For low-clearance installations and retrofit solutions, read Ipe Decking Cupping: Causes, Prevention & Solutions.
Additional technical resource: For deeper explanations, case studies, and corrective solutions, explore Ipe Decking Cupping: Causes, Prevention & Solutions.
Troubleshooting & Common Mistakes
Identify common hardwood decking concerns, understand likely causes, and find practical next steps. For deeper explanations, follow the focused resources under each topic.
01Why Are My Deck Boards Cupping or Warping?
What you’re seeing: Boards curling across their width, lifting at the edges, or developing an uneven surface.
Why it happens: Cupping is commonly caused by unequal moisture conditions between the top and bottom of a board. Direct sunlight dries the upper surface while trapped moisture below keeps the underside damp. Restricted airflow, excessive blocking, poor drainage, and low clearance increase the risk.
What to do: Check ventilation, drainage, and moisture exposure beneath the deck. Address trapped moisture before attempting repairs. Bottom relief grooves may help in some applications, but they do not replace airflow or drainage.
02Why Are My Boards Checking, Cracking or Splitting?
What you’re seeing: Fine cracks following the grain, minor surface checking, or splits near board ends.
Why it happens: Minor surface checking is expected as natural exterior hardwood responds to changes in moisture, sunlight, and temperature. Unsealed cuts and improper fastening can contribute to more significant end splitting.
What to do: Seal fresh cut ends with end-grain wax and use appropriate predrilling and fastening techniques. Minor checking is generally cosmetic; deep cracks or splits that compromise fastening require individual evaluation.
03Why Are the Gaps Between My Boards Changing?
What you’re seeing: Gaps becoming wider or narrower, sometimes unevenly across the deck.
Why it happens: Hardwood expands and contracts as its moisture content changes. Even kiln-dried boards continue responding to humidity, rainfall, and seasonal conditions.
What to do: Use the recommended starting gap for the species and fastening method. Do not install boards excessively tight. Use construction adhesive where specified for the fastening system to help control movement.
04Why Are Black Spots or Dark Stains Appearing?
What you’re seeing: Small black spots, dark streaks, or patches that often emerge after rain.
Why it happens: Iron contamination is a frequent cause. Moisture can trigger dark reactions where iron particles contact tannin-rich wood. Sources include roofing runoff, outdoor furniture legs, railing work, drill-bit shavings, cutting metal above the deck, and microscopic filings from metal-on-metal installation tools.
What to do: Find and remove the source of contamination. For existing marks, an oxalic-acid-based wood brightener such as Messmer’s Part B may help. Follow the product instructions, test first, and rinse thoroughly with clean water.
05Why Won’t My Boards Sit Flat or Straight?
What you’re seeing: Sweep (side-to-side curvature), bow, or twist that requires effort to align while fastening.
Why it happens: Some natural movement is normal; sound hardwood boards are not guaranteed to be perfectly straight. Longer and thicker pieces can require more installer effort.
What to do: Confirm framing alignment first. Bowrench-style straightening tools, ratchet straps, wedges, or carefully positioned chisels can help bring boards into line as fasteners are installed. Avoid damaging edges or over-stressing a board.
06Why Is My Deck Turning Gray or Weathering Unevenly?
What you’re seeing: Brown or reddish tones gradually fading toward silver-gray, sometimes at different rates.
Why it happens: Natural silvering is expected. UV exposure changes surface color. Different sunlight, rain, and shade exposures create uneven weathering, and silvering can return between periodic oil applications.
What to do: Choose between natural gray patina and periodic cleaning and oiling to refresh the original color. Oiling slows color change but does not permanently prevent it; see Chapter 09 for maintenance expectations.
07What Are the Most Common Hardwood Installation Mistakes?
Common mistakes to avoid:
- Skipping end wax on freshly cut board ends.
- Failing to ease cut ends for clean transitions and butt joints.
- Expecting tight, flush mitered corners and interior-style trim to stay immobile outdoors.
- Improper jobsite storage, including ground contact or tightly sealed wet bundles.
- Restricting airflow beneath decking with poor drainage or excessive blocking.
- Choosing an unsuitable fastening system for the wood and exposure conditions.
- Overlooking framing alignment and support before installation.
Finishing, Care & Maintenance
Oiling is optional. For naturally durable hardwood decking, oil primarily helps preserve rich surface color; it is not required for the wood’s inherent long-term structural durability. Allow your deck to weather to a silver-gray patina, or oil periodically if you prefer the original color.
01Quick Answers: Oiling, Silvering & Cleaning
Is oiling required?
No. It is mainly an appearance choice, not a requirement for long-term structural performance.
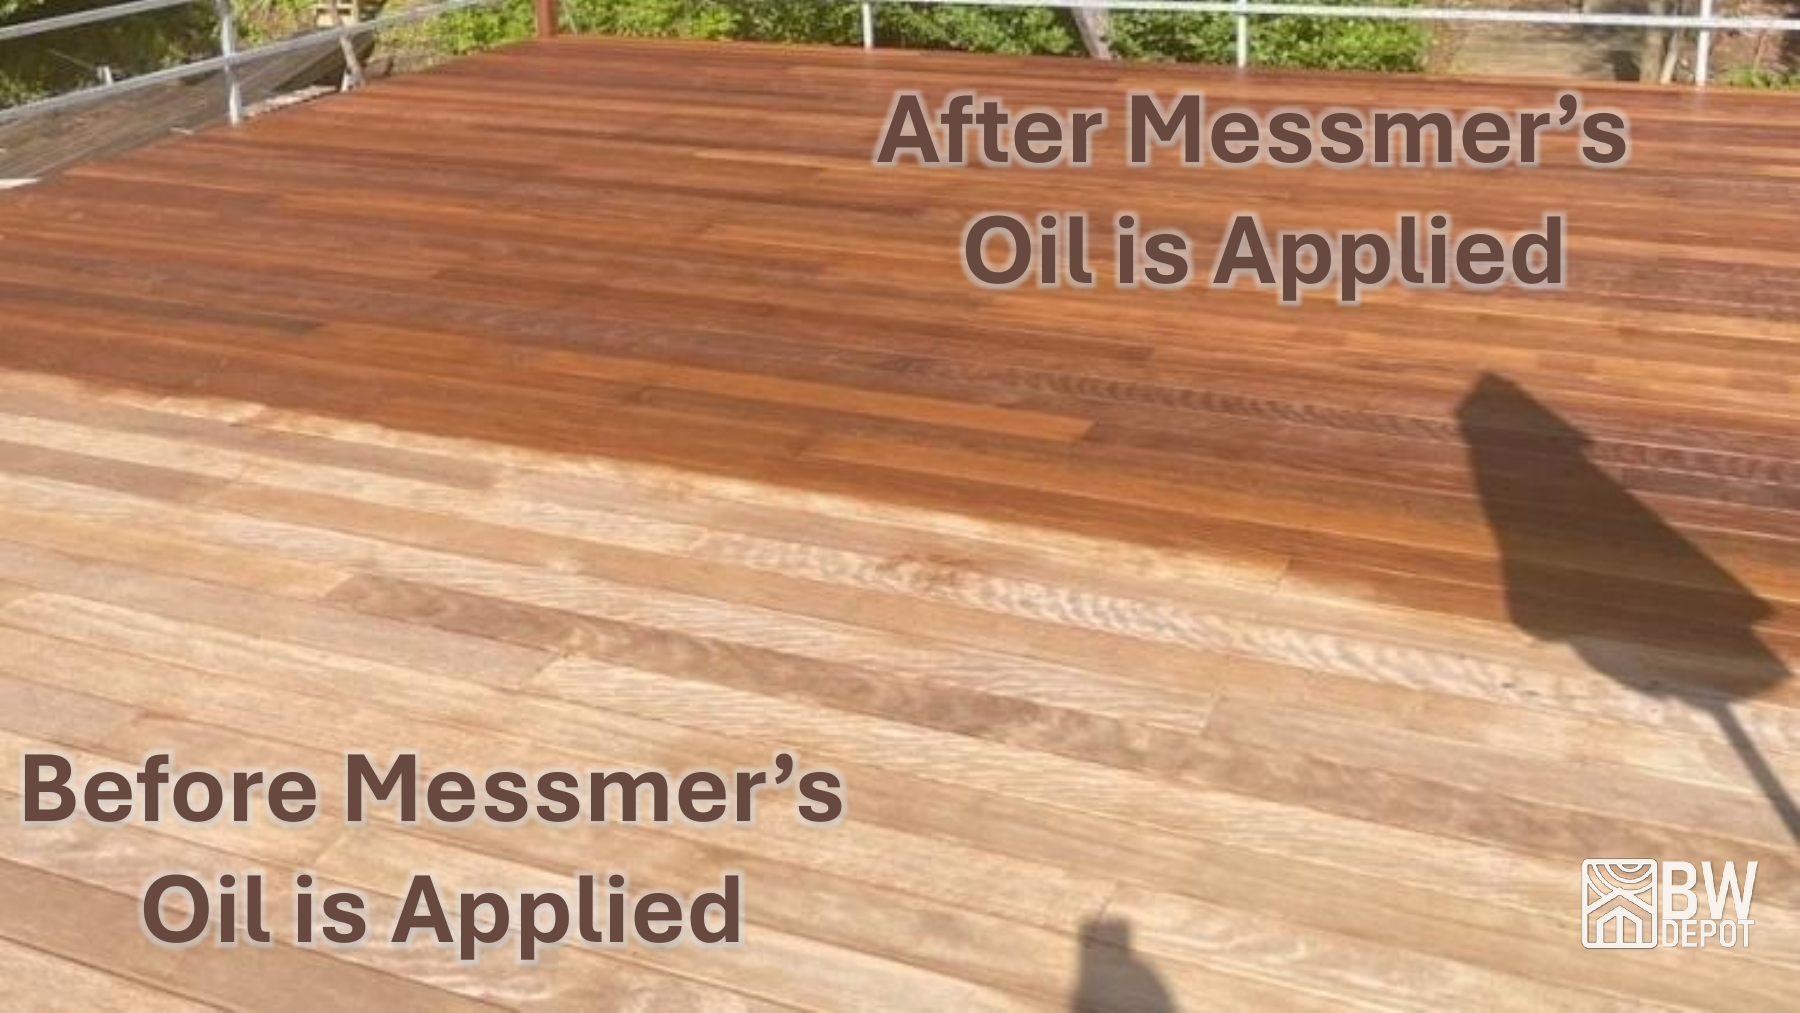
What happens if I don't oil?
Most Brazilian hardwoods gradually develop a natural silver-gray patina. This surface color change is expected and can also happen between periodic oil applications.
How often should I oil?
Only as needed for appearance. Sun exposure and weather determine how quickly the richer color fades.
Should I still clean the deck?
Yes. Periodically clear leaves, debris, and contaminants; keep board gaps and drainage pathways open. Cleaning and brightening can improve appearance even if you choose not to oil.
02The 4 Biggest Oiling Mistakes
- Too much oil: Apply one thin coat. Dense hardwood absorbs less than many people expect; avoid rollers and sprayers.
- Skipping the backwipe: Remove excess oil with a clean rag. Shiny, sticky patches signal overapplication.
- Applying additional coats: One coat at a time; ask BWD before attempting a second application.
- Ignoring the weather: Apply to clean, dry decking, out of direct sunlight, and follow the product label’s temperature and rain-window guidance.
Bonus: Pressure washing is not part of BWD’s standard cleaning and oiling procedure.
Fire safety: Oil-soaked applicators and rags can ignite if improperly stored or discarded. Follow the manufacturer’s disposal instructions.
03Cleaning, Brightening & Restoring Color
Cleaner (Part A) removes accumulated dirt and residue. Brightener (Part B) helps restore the appearance of weathered or stained wood. Exterior hardwood oil is the optional finishing step for preserving a richer tone.
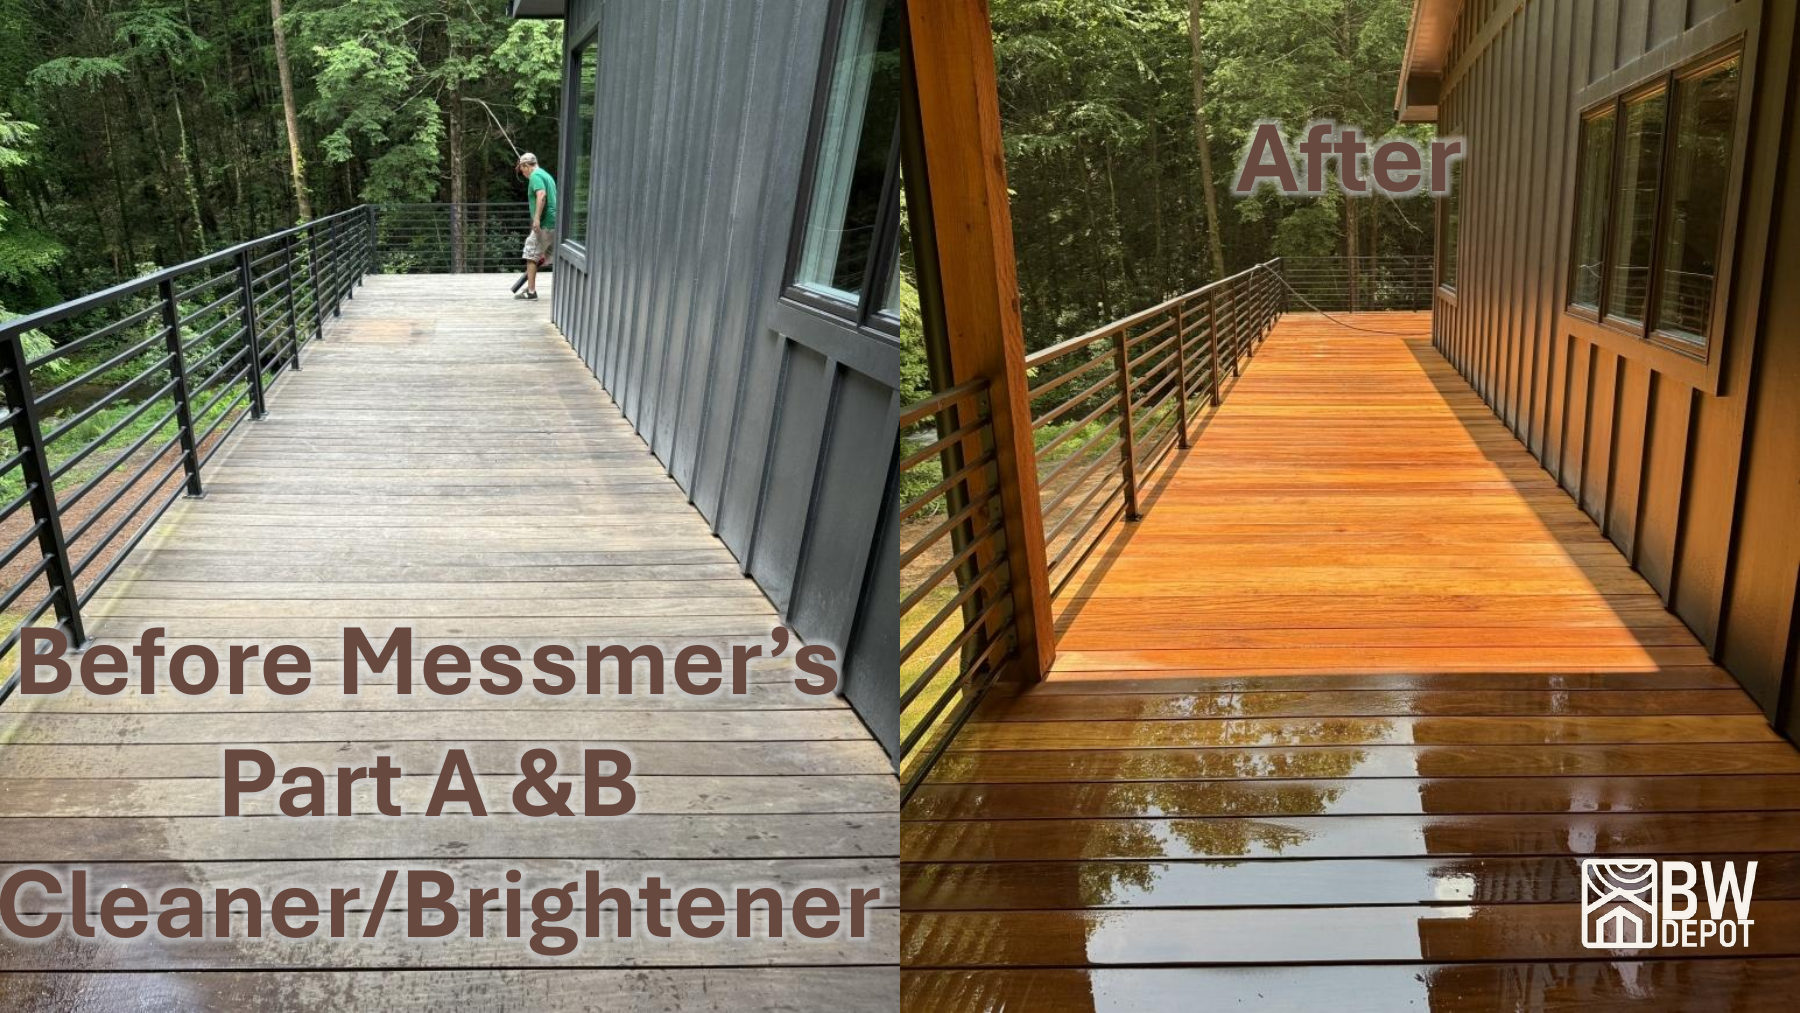
For mixing ratios, surface preparation, application sequence, and safety details, follow the complete instructional guide rather than relying on a brief summary.
Watch the demonstrations and follow the full process for Messmer’s Cleaner, Brightener, and UV Plus Oil.